
Building a 6x8 Gable Shed: Cost, Materials, and DIY Plans

Building a 6x8 Gable Shed: Cost, Materials, and DIY Plans

Building a 6x8 Gable Shed: Cost, Materials, and DIY Plans

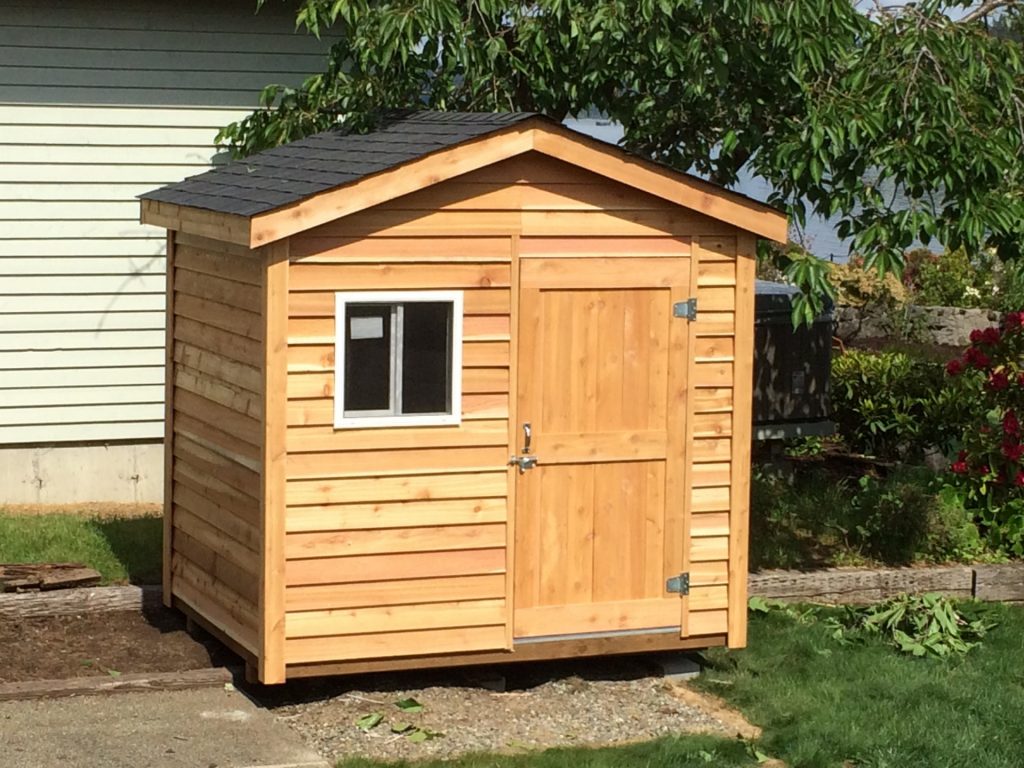
Constructing a 6x8 gable shed offers a practical and cost-effective solution for additional storage space. This comprehensive guide details the process, encompassing cost estimations, necessary materials, and step-by-step DIY plans. Understanding these aspects before commencing the project will ensure a smooth and successful build.

I. Cost Estimation for a 6x8 Gable Shed

The total cost of building a 6x8 gable shed varies depending on several factors, including material choices, location (affecting lumber prices and potential permits), and labor costs (if hiring professionals). A realistic budget should encompass all anticipated expenses.

A. Material Costs:

The majority of your budget will be allocated to materials. Prices fluctuate, so it's crucial to obtain current quotes from local suppliers. Expect to spend approximately:

  • Lumber: $300 - $600 (depending on the type and grade of lumber â€" pressure-treated lumber is recommended for longevity and pest resistance).
  • Roofing: $200 - $500 (costs depend on the chosen roofing material â€" asphalt shingles are a common and affordable option).
  • Hardware: $100 - $200 (nails, screws, hinges, handles, and other fasteners).
  • Doors & Windows (Optional): $50 - $200+ (prices vary greatly depending on size and style).
  • Concrete or Base Preparation: $50 - $200 (this cost depends on whether you need to purchase concrete or gravel, and if you are preparing the base yourself or hiring someone).
  • Other Miscellaneous Items: $50 - $100 (this accounts for items like sealant, paint, and any additional tools you might need to purchase).

Total Estimated Material Cost: $750 - $1600. This is a broad range, and actual costs may differ based on your specific choices and regional pricing.

B. Labor Costs:

If you choose to undertake the project yourself, labor costs are minimal, primarily limited to your time and effort. However, if you hire professionals, expect to pay considerably more. Contractors typically charge by the hour or per project, and the cost will depend on their experience and local rates. Consider budgeting at least $1000-$2000 for professional labor.

C. Permits and Inspections:

Check with your local authorities regarding building permits and inspections. Permitting requirements vary significantly by location. Costs range from minimal to several hundred dollars, depending on your area’s regulations and the complexity of the project.

II. Necessary Materials for a 6x8 Gable Shed

A detailed list of materials is essential for a successful build. This list provides a comprehensive overview; exact quantities will vary based on your design specifics and lumber dimensions.

  • Pressure-treated Lumber: 4x4 posts for the foundation, 2x4s for the walls and roof framing, 2x6s for the rafters, and appropriate lumber for the floor.
  • Plywood or OSB Sheathing: For the walls and roof.
  • Roofing Material: Asphalt shingles, metal roofing, or other chosen material.
  • Doors: Shed door(s) of appropriate size.
  • Windows (Optional): If desired.
  • Fasteners: Nails, screws, and other hardware.
  • Concrete or Gravel: For the foundation.
  • House Wrap (Optional): For added weather protection.
  • Paint or Stain (Optional): For exterior finish.
  • Tools: Measuring tape, saw (circular saw or hand saw), hammer, drill, level, shovel, etc. A complete tool list will be provided later.

III. DIY Plans for a 6x8 Gable Shed

These plans outline a basic framework. Modifications can be made to suit individual needs and preferences. Safety precautions should be followed meticulously throughout the building process. Always wear appropriate safety gear, including safety glasses and work gloves.

A. Foundation Preparation:

  1. Level the Ground: Ensure a level base for the shed. Remove any debris or vegetation.
  2. Create a Foundation: This can be a simple gravel base, a concrete slab, or concrete piers. The chosen method depends on soil conditions and personal preference.

B. Floor Construction:

  1. Install Pressure-Treated Skids: Place pressure-treated 4x4s or 6x6s around the perimeter of the shed's footprint to serve as a foundation for the floor joists.
  2. Install Floor Joists: Lay pressure-treated 2x6s or 2x8s across the skids, spaced appropriately (typically 16" on center).
  3. Install Subflooring: Attach plywood or OSB sheathing to the floor joists.

C. Wall Framing:

  1. Construct Wall Frames: Build rectangular frames using 2x4s, ensuring proper squareness and bracing.
  2. Attach Sheathing: Cover the wall frames with plywood or OSB sheathing.
  3. Erect Walls: Carefully lift and position the wall frames onto the floor, securing them to the floor joists.

D. Roof Framing:

  1. Install Rafter Plates: Attach 2x4s along the top of the walls to support the rafters.
  2. Cut and Install Rafters: Cut rafters to the correct length and angle, ensuring proper overhang. Secure them to the rafter plates.
  3. Install Roof Sheathing: Attach plywood or OSB sheathing to the rafters.

E. Roofing Installation:

  1. Install Underlayment: Apply roofing underlayment to protect the sheathing from moisture.
  2. Install Roofing Material: Follow the manufacturer's instructions for installing your chosen roofing material (e.g., asphalt shingles).

F. Door and Window Installation (Optional):

  1. Cut Openings: Carefully cut openings for the doors and windows, ensuring proper framing.
  2. Install Doors and Windows: Install doors and windows according to manufacturer instructions.

G. Finishing Touches:

  1. Exterior Finishing: Apply paint or stain to protect the wood from the elements.
  2. Clean Up: Remove debris and dispose of waste materials responsibly.

Disclaimer: These plans provide a general framework. Consult with a qualified builder or contractor for detailed plans and advice tailored to your specific needs and local building codes. Always prioritize safety throughout the construction process.

Building a 6x8 gable shed can be a rewarding DIY project. By carefully planning and following these guidelines, you can create a valuable addition to your property, enhancing storage capabilities and increasing property value.
Share:

Affordable 6x8 Firewood Shed Plans for DIY Builders on a Budget

Affordable 6x8 Firewood Shed Plans for DIY Builders on a Budget

Affordable 6x8 Firewood Shed Plans for DIY Builders on a Budget

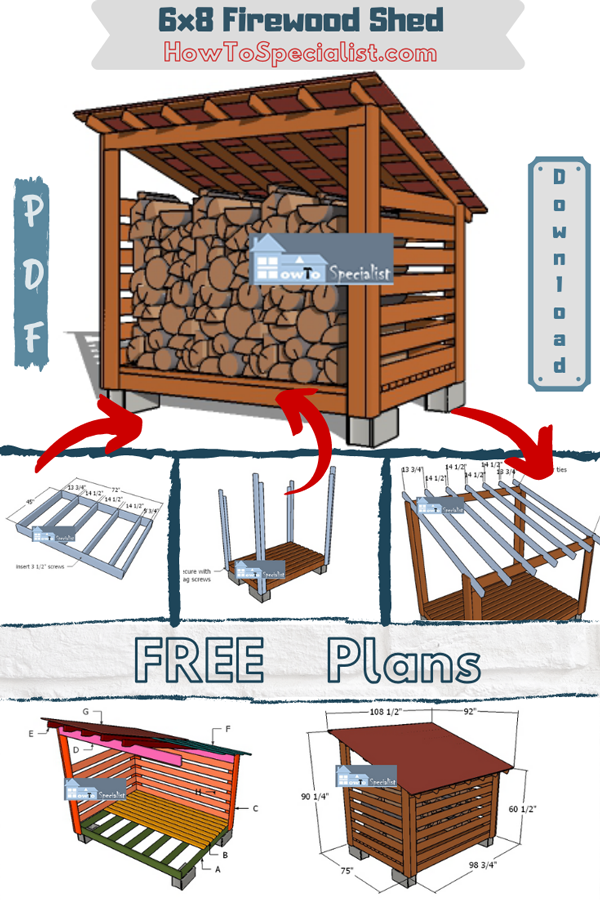
Hey there, fellow DIY enthusiasts! So you're looking to build a firewood shed, huh? Smart move! Keeping your firewood dry and off the ground is key to a successful, cozy winter. But let's be real, pre-built sheds can cost a fortune. That's why I'm here to walk you through building your own 6x8 firewood shedâ€"affordably and efficiently. This guide is packed with tips and tricks for keeping costs down without sacrificing quality. Let's get started!

Planning Your 6x8 Firewood Shed

Before you even think about grabbing a hammer, some careful planning is crucial. This isn't rocket science, but a little foresight will save you headaches (and money!) down the line.

Choosing Your Location

Think about where this shed will live. You'll want it close enough to your house for easy access, but ideally slightly away from the main house to minimize fire risk. Consider proximity to where you'll be stacking your woodâ€"less carrying means less work! Also, check your local building codes. Some areas have restrictions on shed sizes and placement.

Materials Selection: Keeping it Budget-Friendly

This is where you can really make a difference in your budget. Don't be afraid to think outside the box (literally!).
  • Pressure-treated lumber: Essential for ground contact, but can be pricey. Consider using it only for the base and bottom plates, and opting for less expensive lumber for the walls and roof.
  • Reclaimed lumber: If you're lucky enough to have access to reclaimed lumber (old pallets, etc.), you can significantly cut down costs. Just be sure it's in good condition and free from rot or pests.
  • Alternative roofing: Asphalt shingles are common, but corrugated metal roofing is surprisingly affordable and durable. It's also easier to work with than shingles.
  • Secondhand materials: Check out your local salvage yards or classified ads. You might be surprised by what deals you can find on used doors, windows, or even framing lumber.

Design Considerations: Simple is Best

For a budget-friendly build, keep the design simple. A basic A-frame roof is easy to construct and requires less material than more complex designs. Focus on functionality rather than fancy architectural details. Remember, this is a firewood shed, not a mansion!

Building Your 6x8 Firewood Shed: A Step-by-Step Guide

Alright, let's get our hands dirty! This is a general outline; you'll need to adapt it based on your specific design and materials.

Foundation: The Solid Base

Start with a sturdy foundation. A simple concrete slab is ideal, but you can also use treated lumber to create a raised platform. This will help prevent rot and keep your firewood off the damp ground. Leveling is key here â€" use a level frequently!

Framing: The Skeleton of Your Shed

This is where the majority of your lumber will go. Build the walls using a standard framing technique, ensuring your walls are square and plumb. Don't forget to include door and window openings. Pre-assemble the walls as much as possible to make construction easier.

Roof Construction: Keeping it Dry

The roof is crucial for protecting your firewood. A simple A-frame roof is straightforward to construct. Make sure to add sufficient overhang to keep rain and snow from getting in. Once the rafters are in place, cover them with your chosen roofing material. Remember to use appropriate flashing around any openings to prevent leaks.

Siding and Trim: The Finishing Touches

Add your chosen siding material. This could be anything from simple plywood to more decorative options, depending on your budget and aesthetic preferences. Add trim pieces to finish off the edges and give the shed a more polished look.

Door and Windows: Access and Ventilation

Install your door and any windows you've included in your plan. Make sure the door closes securely, and consider adding weatherstripping to keep out drafts and moisture. Ventilation is also important to prevent mold and mildew, so if you didn’t include windows, add vents to your design.

Tips for Staying on Budget

* **Shop around for materials:** Prices can vary significantly between different lumber yards and home improvement stores. * **Buy in bulk when possible:** You'll often get better deals if you buy your lumber in larger quantities. * **Borrow or rent tools:** Avoid the expense of buying tools you may only use once. * **Enlist help from friends:** Having extra hands can speed up the construction process and make it more enjoyable. * **Don't be afraid to ask for advice:** Experienced DIYers can provide invaluable assistance.

Commonly Asked Questions

Q: How long will it take to build a 6x8 firewood shed?

A: This depends on your experience and the complexity of your design. Expect to spend several weekends, perhaps even a couple of weeks, for a complete build.

Q: Do I need a building permit?

A: This depends on your local building codes. Check with your local authorities before you begin construction.

Q: What kind of tools will I need?

A: You'll need basic carpentry tools such as a hammer, saw, drill, level, measuring tape, and possibly a nail gun.

Q: Can I build this shed by myself?

A: While it's possible, it's generally easier and safer to have a helper, especially for lifting heavy materials.

Q: What if I make a mistake during construction?

A: Don't panic! Mistakes happen. Take your time, double-check your measurements, and don't be afraid to ask for help. A little ingenuity can often fix a small error.

Remember, building your own firewood shed is a rewarding experience. By following these plans and tips, you can create a durable and functional shed without breaking the bank. Happy building!
Share:

Explore Compact 8x6 Shed Plans for Your Backyard Storage Needs

Explore Compact 8x6 Shed Plans for Your Backyard Storage Needs

Compact 8x6 Shed Plans for Your Backyard Storage Needs

So, you're looking for extra storage space, but your backyard isn't exactly sprawling. You've got bikes, garden tools, maybe even some seasonal decorations taking up valuable garage space or cluttering your home. An 8x6 shed might be the perfect solution! It's compact enough to fit into most backyards without feeling overwhelming, yet spacious enough to be genuinely useful. Let's dive into what makes these little storage powerhouses so appealing and explore what you need to know before you start building.

Why Choose an 8x6 Shed?

The beauty of an 8x6 shed lies in its versatility and compact design. It's not too big to be an eyesore or require excessive building permits (always check your local regulations!), and it's not so small that it feels cramped and useless. Here's a breakdown of the advantages:

Space-Saving Design

The compact footprint makes it ideal for smaller yards, fitting neatly alongside fences, in corners, or even nestled amongst landscaping. It won't dominate your outdoor space, allowing your garden or patio to remain the focal point.

Affordability

Generally, smaller sheds are more affordable than larger ones. This is due to less material usage and potentially simpler construction. You'll save money on lumber, roofing materials, and potentially even labor costs if you're hiring someone to help.

Easy Construction

Many 8x6 shed plans are designed for DIY enthusiasts. While some experience is helpful, the smaller size makes the project more manageable for beginners. You can break the project into manageable chunks over a weekend, or even several weekends, depending on your schedule and skill level.

Versatile Storage

Don't underestimate the storage capacity! An 8x6 shed can hold surprisingly a lot. Think lawnmowers, garden tools, potting supplies, bikes, sporting equipment, outdoor furniture cushions, holiday decorations â€" the possibilities are endless! Strategic shelving and organization can maximize every inch of space.

Planning Your 8x6 Shed Project

Before you grab your hammer and nails, careful planning is essential for a successful shed build. Here's a step-by-step approach:

Choosing Your Shed Style

Do you prefer a classic gable roof, a more modern flat roof, or perhaps a charming pent roof? The style will influence the overall look of your shed and, to some extent, the building process. Consider your existing backyard aesthetic and choose a style that complements your home and landscape.

Sourcing Materials

Lumber is a major component. Pressure-treated lumber is recommended for its durability and resistance to rot and insect damage. You'll also need roofing materials (shingles, felt paper), screws, nails, hardware (hinges, handles, locks), and any additional features you plan to add (windows, vents). Shop around for the best prices, and don't forget to factor in delivery costs if necessary.

Obtaining Necessary Permits

This is crucial. Check with your local council or homeowner's association about building regulations and permit requirements. Failing to obtain the necessary permits could result in fines or even the need to dismantle your shed. It's always better to be safe than sorry.

Preparing the Site

Leveling the ground is critical for a stable shed. Use a spirit level and remove any sod, rocks, or debris from the area. Consider using a concrete slab for a more permanent and stable base, or a compacted gravel base for a simpler, more budget-friendly option.

Choosing Your Shed Plans

You can find countless free and paid plans online. Look for plans that include detailed diagrams, materials lists, and step-by-step instructions. If you're a beginner, choose plans that are clearly written and easy to follow. Remember to double-check measurements and calculations before you start building.

Building Your 8x6 Shed: A Simplified Overview

The actual building process varies depending on your chosen plans, but generally involves these steps:

  1. Laying the Foundation: This could be a concrete slab, a gravel base, or even just a level area of compacted earth. The stability of your foundation is paramount.
  2. Building the Floor Frame: This creates the base for your shed walls and provides structural support.
  3. Erecting the Walls: Carefully assemble the wall frames according to your plans, ensuring they are square and plumb.
  4. Installing the Roof: This is usually the most challenging part, particularly if you've chosen a gable or hip roof. Make sure to properly install the roofing felt before adding shingles to prevent leaks.
  5. Adding Doors and Windows: Install doors and windows securely, ensuring they are properly aligned and sealed.
  6. Finishing Touches: Add any trim, paint, or other finishing touches to complete the look of your shed.

Adding Personal Touches to Your Shed

Once your basic shed is constructed, the fun part begins! Consider these enhancements:

  • Shelving: Maximize storage space with custom-built shelves.
  • Workbenches: If you plan to use your shed for DIY projects, a workbench is a valuable addition.
  • Lighting: Install interior lighting for easy access in low-light conditions.
  • Ventilation: Add vents or windows to improve air circulation and prevent moisture buildup.
  • Painting or Staining: Protect the wood and add a touch of personality with paint or stain.

Commonly Asked Questions

Q: How much does it cost to build an 8x6 shed?

A: The cost varies greatly depending on materials, location, and whether you hire help. You can expect to spend anywhere from a few hundred dollars (for a very basic shed using reclaimed materials) to several thousand (for a high-end shed with premium materials and professional construction).

Q: How long does it take to build an 8x6 shed?

A: Depending on your experience and the complexity of the design, building an 8x6 shed could take anywhere from a long weekend to several weeks.

Q: Do I need any special tools?

A: Basic hand tools like hammers, saws, screwdrivers, and measuring tape are essential. Power tools like a drill, circular saw, and possibly a miter saw can significantly speed up the process.

Q: Can I build an 8x6 shed myself?

A: Absolutely! Many DIYers successfully build sheds of this size. However, if you lack experience, consider starting with a simpler design and seeking help from experienced friends or family members.

Q: What kind of foundation do I need?

A: The best foundation depends on your soil conditions and budget. A compacted gravel base is a good budget-friendly option. For greater stability, a concrete slab is recommended.

Building your own 8x6 shed can be a rewarding and cost-effective way to add valuable storage space to your backyard. With careful planning and execution, you can create a durable and functional structure that will serve you for years to come. Remember to always prioritize safety and check local regulations before you begin!

Share:

Followers

Search This Blog

Powered by Blogger.

Blog Archive

Recent Posts

Theme Support